Seed Growing Activites with Kids
Growing with Kids
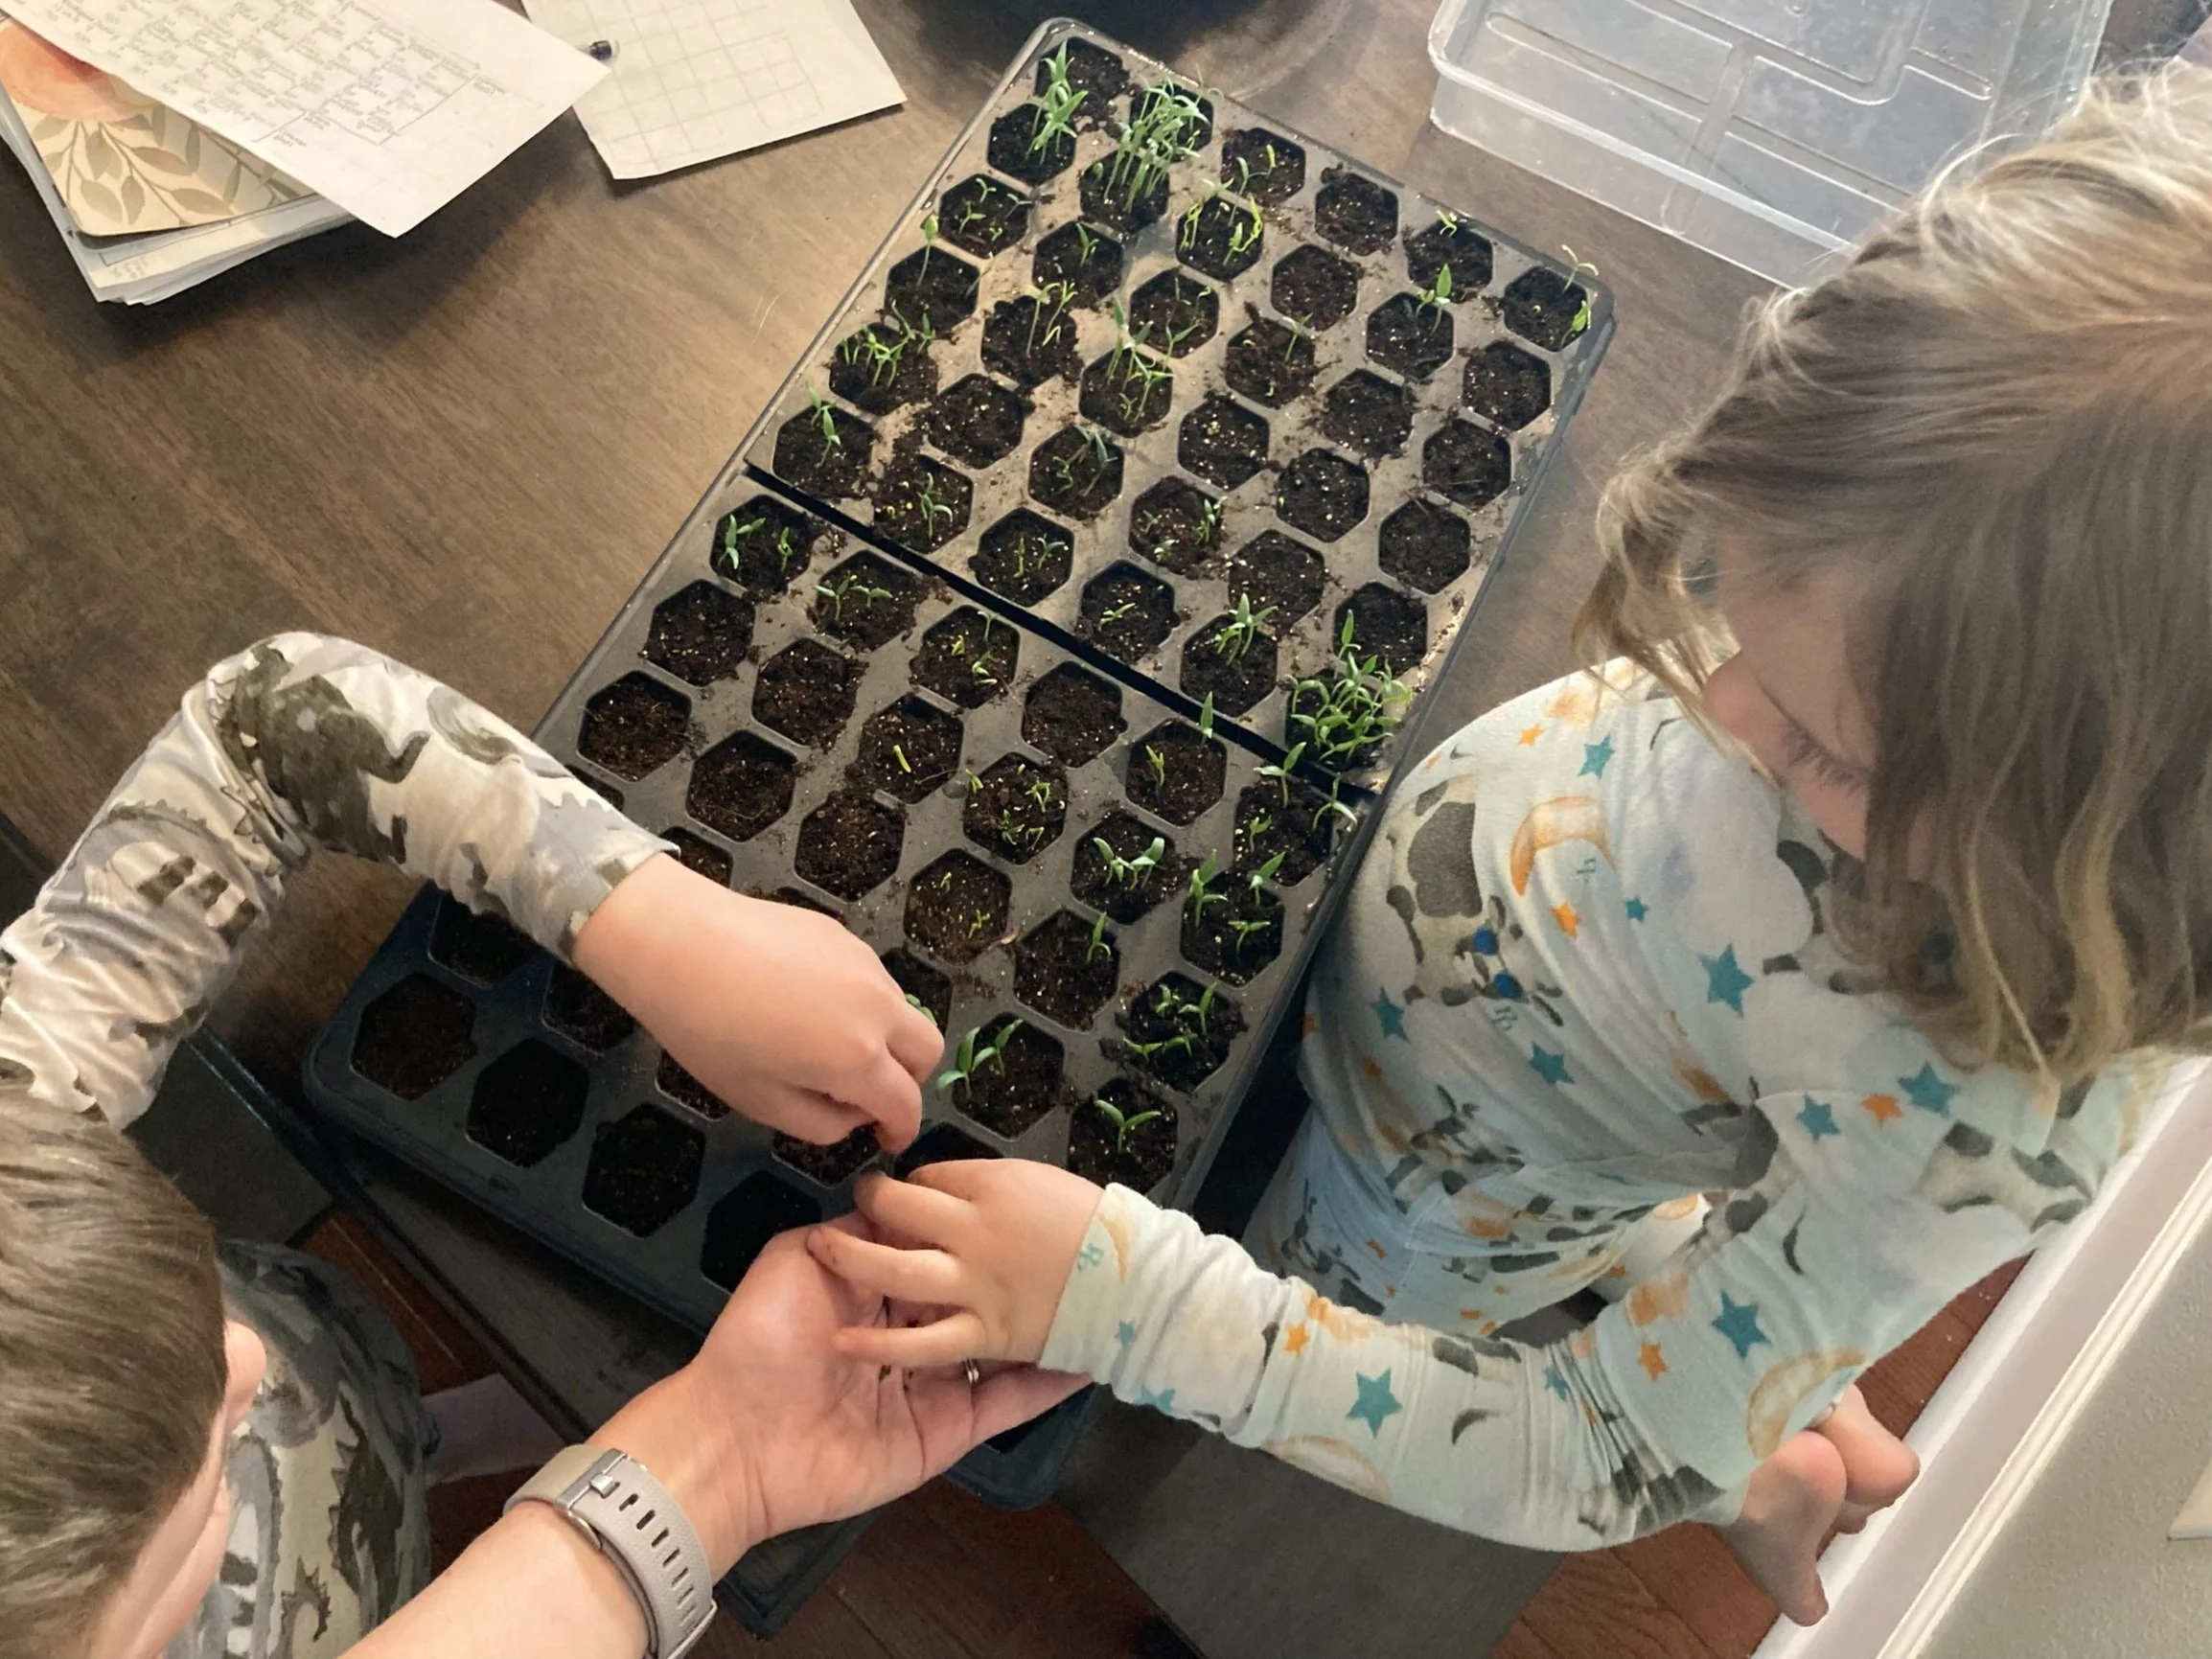
My kids love getting their hands in the soil. Kids and adults alike can enjoy the magic of watching seeds sprout. Here are a couple of projects to do at home or in the classroom.
Project 1: Plant seeds in a decorated pot
Supplies:
2-3” pot. Any material will do, including DIY - newspaper or toilet paper roll/ paper towel roll pot (snugly fold in the ends). Plastic cups are another option, and so many things can be repurposed from around the house.
Seeds. Large seeds are great for seeing what’s growing. Squash, sunflowers, beans.
Spray bottle or a watering can
Soil
Steps:
Optional to decorate the pot. Markers, stickers, paint, get creative!
Fill the pot with soil. It helps to add your soil to a bowl first and add just enough water to make the soil slightly moist.
Plant 2-3 seeds. For large seeds like squash and beans, about 1” deep will be good.
Spray or gently water the seeds in. Optional to place in a ziplock baggie. Place in a warm and sunny spot, like a south facing window.
Check on your seeds a couple of times a day. It’s important to make sure it stays evenly moist. Not too wet and not too dry. Goldilocks metaphor! If they are in a baggie, they shouldn't need any additional water.
After several days, keep a close eye for your sprouts.
Keep them in an area with lots of light and enjoy watching them grow! Depending on what you planted, you may be able to transplant it into a pot outside or into a garden if you have one.
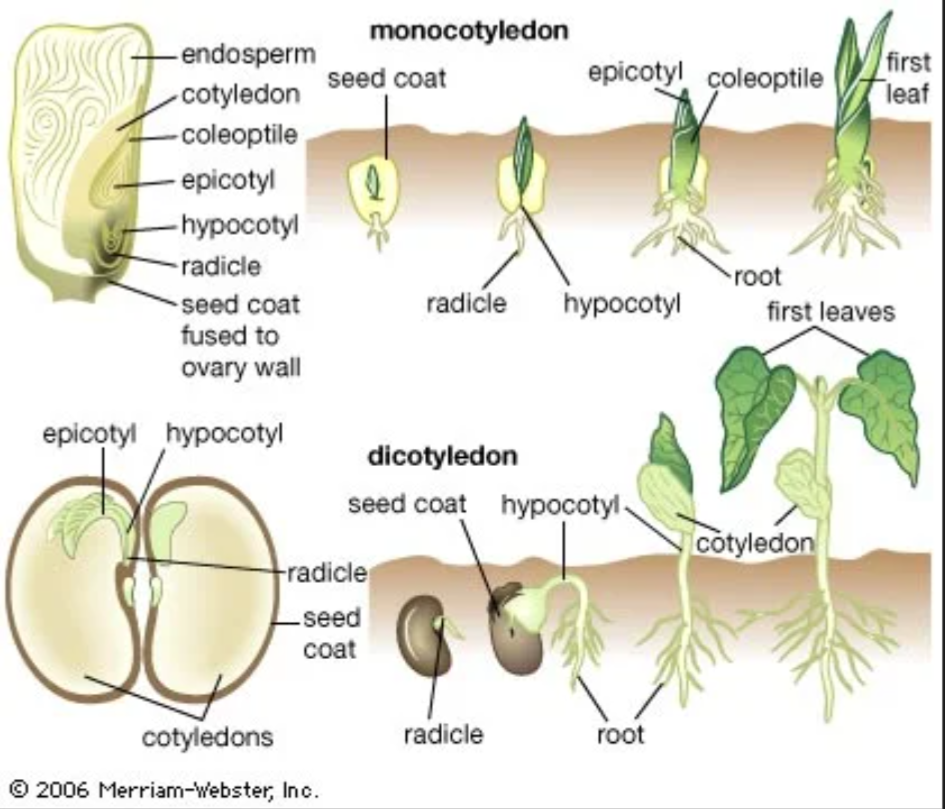
Image credit: http://brittanica.com
Project 2: Window Grow Baggie
Another fun experiment with kids is to grow seeds in a bag so that you can watch them sprout and emerge from their seed coats.
Supplies:
Plastic bag, like a ziplock
A piece of paper towel or cotton balls or orbeez
Spray bottle (optional)
Seeds like squash, beans, and sunflowers
Steps:
Wet your paper towel or cotton balls (not too wet - wrung out) and place in baggie.
Place seeds against the growing medium so that you can see one side.
Seal the bag and tape or place against a sunny window.
Observe them emerging. The first part that emerges is called the radicle.
You can try gently transplanting them into soil in a pot or garden if you would like.


Hope you try these easy projects! If you would like an in-depth guide on seed starting, check out my seed starting series